Widget Settings and Customization (Optional)
Widget Blog
Beberapa panduan untuk Widget Blog atau setelan postingan, seperti beberapa mode custom postingan yang terdapat di template tertentu, mengaktifkan fitur Dark Mode secara permanen dan lain sebagainya.
Menggunakan Fitur FullPage
Fitur Fullpage dapat digunakan untuk merubah tata letak postingan atau merubah tampilan halaman dengan menghilangkan elemen sidebar yang bertujuan untuk memberi ruang lebih agar pembaca/pengunjung blog bisa lebih fokus ke konten.
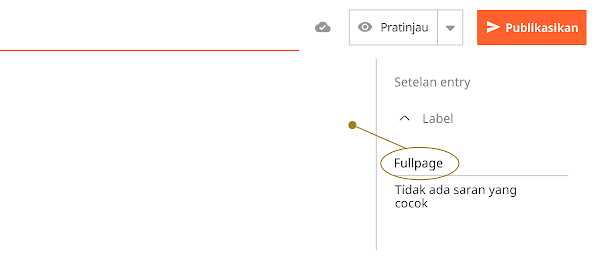
Untuk menggunakannya cukup tambahkan label 'Fullpage' pada postingan Anda seperti pada gambar dibawah ini:
Tentu, Anda juga bisa merubah nama label di atas dengan nama label lain sesuai keinginan. Untuk melakukannya Anda harus mengedit HTML template terlebih dahulu, silahkan temukan kode seperti ini pada template Anda lalu ubah bagian yang ditandai:
"Fullpage"
Petunjuk:
Terdapat lebih dari satu kode di atas dalam template yang Anda harus ubah semuanya, gunakan find and replace fitur untuk mempercepat pengeditan dengan menekan ctrl + shift + R di editor HTML template.
Menggunakan Halaman Sponsored
Sponsored Page memungkinkan Anda menambahkan postingan berbayar (iklan/review) untuk produk tertentu dalam blog, dalam mode ini informasi penulis tidak akan ditampilkan.
Sama seperti fitur sebelumnya, untuk menggukanan halaman Sponsor Anda harus menambahkan label 'Sponsored' di postingan yang Anda inginkan. Nama label juga bisa diubah, temukan dan ganti beberapa kode seperti di bawah ini:
"Sponsored"
Menggunakan Halaman Product (Median UI Only)
Halaman Produk hanya tersedia untuk template Median UI, Anda bisa melihat contoh tampilannya disini. Selain menambahkan label 'Product' pada postingan, kami juga sudah menyediakan template postingan dalam bundle produk yang harus Anda gunakan untuk mode halaman ini:
- Buka folder 'Post and Pages' dalam Google Drive,
- temukan file dengan nama
Product Post.txt - salin semua kode yang ada,
- pada editor postingan Blogger, silahkan pindah ke mode HTML dengan cara klik icon lalu pilih Tampilan HTML
- Tempel semua kode yang sudah disalin tadi ke dalam postingan.
- Edit dan tambahkan media pendukung seperti nama, gambar produk serta daftar harga sebelum menyimpan postingan Anda.
Nama label tersebut juga bisa diubah, Anda hanya perlu temukan dan ganti beberapa kode seperti dibawah ini:
"Product"
Mengaktifkan Dark Mode Secara Permanen
Sebagian dari Anda mungkin menginginkan menggunakan mode gelap secara permanen dan menjadikan mode terang sebagai alternatif, ini mungkin sedikit sulit tapi Anda bisa menerapkan ini dengan mengganti beberapa kode HTML blog Anda.
Langkah pertama tambahkan kode di bawah ini sesudah tag <body>:
<b:class name='drK'/>
Langkah selanjutnya kami sudah menandai beberapa bagian kode yang harus Anda ubah beserta contohnya, tugas Anda hanya mencari beberapa kode yang sudah ditandai di bawah ini (kode ditempatkan secara terpisah di beberapa bagian HTML blog):
document.querySelector('#mainCont').classList.add('drK') : document.querySelector('#mainCont').classList.remove('drK')
document.querySelector('#mainCont').classList.remove('drK') : document.querySelector('#mainCont').classList.add('drK')
document.querySelector("#mainCont").classList.add("drK"):document.querySelector("#mainCont").classList.remove("drK")
document.querySelector("#mainCont").classList.remove("drK"):document.querySelector("#mainCont").classList.add("drK")
Mengaktifkan Grid Mode Secara Permanen (Fletro Pro Only)
Pada template Fletro Pro Anda akan menemukan fitur tambahan yang memungkinkan Anda untuk mengubah layout postingan dari Daftar(default) menjadi Grid, bagaimanapun Anda mungkin ingin menggunakan mode Grid secara permanen, tidak jauh berbeda dengan cara mengganti Darkmode Anda harus menambahkan dan mengganti beberapa kode di bawah ini pada kode HTML blog Anda.
Pertama, tambahkan kode di bawah ini tepat setelah tag <body>:
<b:class cond='data:view.isMultipleItems' name='grD'/>
Kedua, temukan dan ganti dua kode berikut sesuai contoh yang tertera:
document.querySelector('#mainCont').classList.add('grD') : document.querySelector('#mainCont').classList.remove('grD')
document.querySelector('#mainCont').classList.remove('grD') : document.querySelector('#mainCont').classList.add('grD')
document.querySelector("#mainCont").classList.add("grD"):document.querySelector("#mainCont").classList.remove("grD")
document.querySelector("#mainCont").classList.remove("grD"):document.querySelector("#mainCont").classList.add("grD")
Mengubah Jumlah Baris Maksimal pada Judul dan Ringkasan Postingan
Kami membatasi jumlah baris maksimal untuk judul postingan dengan batas 3 baris dan ringkasan/cuplikan postingan dengan batar 2 baris di halaman beranda, postingan dengan judul yang panjang mungkin saja akan terpotong. Jika Anda tidak ingin hal ini terjadi, gantilah kode CSS bertanda di bawah ini:
.aTtl a, .pSnpt{color:inherit; display:-webkit-box;-webkit-line-clamp:3; ... }

.pSnpt{-webkit-line-clamp:2; ... }
- Ubah angka
3dan2pada kode di atas untuk menentukan batas baris maksimal, - Ubah
display:-webkit-box;menjadidisplay:block;untuk menonaktifkan pembatasan baris maksimal.
Format Stempel Waktu Postingan
Penulisan stempel waktu postingan diatur secara baku dengan format MMM d, y, Anda tidak bisa merubah format ini melalui Tata letak atau Setelan Blogger.
Kami sudah melakukan riset dan menentukan format ini yang paling ringkas dan mudah difahami oleh pembaca, jika Anda tidak menyukai format ini satu-satunya cara untuk merubahnya adalah dengan mengedit HTML template Anda.
Sebelum itu silahkan pelajari terlebih dahulu format penulisan tanggal pada HTML di halaman: unicode.org
Selanjutnya pada HTML template silahkan cari kode MMM d, y, MMMM d, y, MMM d, YYYY, MMMM d, YYYY. Setiap template mungkin memiliki kode berbeda, jadi carilah salah satu dari kode tersebut. Contoh penulisan lengkap dalam HTML template adalah seperti ini:
<time class='aTtmp pTtmp pbl' expr:data-text='format(data:post.date, "MMM d, y")' expr:datetime='data:post.date.iso8601' expr:title='"Published: " + data:post.date format "MMMM d, y"'/>
Sembunyikan Keterangan/Caption Gambar pada Ringkasan (Snippet) Postingan
Untuk menyembunyikan caption gambar pada snippet postingan, Anda harus menemukan dan merubah kode di bawah ini seperti pada contoh:
<b:includable id='postEntrySnippet'>
  <b:eval expr='snippet(data:post.snippets.long, {length: 150, links: false, linebreaks: false})'/>
  <!--<b:eval expr='snippet(data:post.body, {length: 90, links: false, linebreaks: false})'/>-->
</b:includable>
<b:includable id='postEntrySnippet'>
  <!--<b:eval expr='snippet(data:post.snippets.long, {length: 150, links: false, linebreaks: false})'/>-->
  <b:eval expr='snippet(data:post.body, {length: 90, links: false, linebreaks: false})'/>
</b:includable>
Perlu diperhatikan mengganti kode di atas juga akan mengakibatkan beberapa tag tertentu terbaca pada snippet(cuplikan) postingan. Anda mungkin akan menemukan error Tampilan Listing Postingan yang Tidak Sejajar ketika menggunakan fitur ini.
Nonaktifkan Tanggal Pembaruan Postingan
Pada tema kami tanggal postingan akan otomatis berubah berdasarkan tanggal terakhir postingan diperbarui, ini penting untuk memberitahu pembaca kalau artikel yang sedang dibacanya tidak usang.
Kami tidak mengerti jika ada orang yang ingin menghapus fitur ini dalam blognya, tapi ini kode yang harus diubah untuk menonaktifkan fitur ini:
<b:includable id='postTimestamps'>
<b:if cond='data:post.lastUpdated != data:post.date'>
<time class='aTtmp pTtmp upd' data-date='Updated:' expr:data-text='format(data:post.lastUpdated, "MMMM d, YYYY")' expr:data-time='format(data:post.lastUpdated, "MMM d, YYYY")' expr:datetime='data:post.lastUpdated.iso8601' expr:title='"Last updated: " + data:post.lastUpdated format "MMMM d, YYYY"'/>
<b:else/>
<time class='aTtmp pTtmp pbl' expr:data-text='format(data:post.date, "MMMM d, YYYY")' expr:data-time='format(data:post.lastUpdated, "MMM d, YYYY")' expr:datetime='data:post.date.iso8601' expr:title='"Published: " + data:post.date format "MMMM d, YYYY"'/>
</b:if>
</b:includable>
<b:includable id='postTimestamps'>
<time class='aTtmp pTtmp pbl' expr:data-text='format(data:post.date, "MMMM d, YYYY")' expr:data-time='format(data:post.lastUpdated, "MMM d, YYYY")' expr:datetime='data:post.date.iso8601' expr:title='"Published: " + data:post.date format "MMMM d, YYYY"'/>
</b:includable>
Nonaktifkan Fitur Reading Time
Reading Time befungsi untuk menentukan perkiraan waktu yang dihabiskan untuk membaca keseluruhan artikel, waktu yang ditampilkan otomatis berubah sesuai dengan panjang atau banyaknya karakter dalam sebuah artikel.
Bagaimanapun, Anda juga bisa menonaktifkan fitur ini dengan cara menghapus kode seperti dibawah ini:
<!--[ Reading time ]-->
<div class='pRd pIn'><bdi id='rdTime'/></div>
<script>/*<![CDATA[*/ function get_text(el) { ... maincount = Math.round(counted); document.getElementById('rdTime').innerHTML = maincount + ' min read'; /*]]>*/</script>
Nonaktifkan Deskripsi di Bawah Judul Postingan
Deskripsi ini akan otomatis muncul jika deskripsi penelusuran pada postingan diaktifkan, deskripsi ini juga yang akan muncul pada hasil pencarian nantinya. Menonaktifkan atau menyembunyikan fitur ini tidak akan menghilangkan deskripsi postingan pada hasil pencarian.
Silahkan temukan dan hapus kode dibawah ini untuk menyembunyikan fitur ini:
<!-- Post Description -->
<div class='pDesc'><data:blog.metaDescription/></div>
Mengubah Layout Widget Artikel Terkait
Fitur Artikel Terkait tersedia dalam 4 gaya berbeda, secara default gaya yang digunakan dalam setelan awal adalah gaya nomor 4, Anda bisa mengubahnya dengan cara mengganti angka yang ditandai pada kode di bawah:
// Change the related post style, there are 4 styles available
widgetStyle: 4,
Nonaktifkan Pop-up (Melayang) dan Tombol Show/Hide pada Komentar
Kami menyediakan 3 alternatif gaya untuk komentar Blogger, Anda bisa menentukan untuk tetap mempertahankan gaya melayang atau menggunakan tampilan sederhana.
Untuk menonaktifkan fitur komentar melayang, silahkan temukan dan hapus atau nonaktifkan tag di bawah ini dengan cara menambahkan tag comment <!-- dan -->.
<!--[ Delete tag below to disable Pop-up comments ]-->
<b:class name='cmBr fixL'/>
<!--[ Delete tag below to disable Pop-up comments ]-->
<!--<b:class name='cmBr fixL'/>-->
Anda juga dapat menggunakan tampilan komentar sederhana tanpa tombol show/hide dengan menonaktifkan tag dibawah ini:
<!--[ Delete tag below to disable show/hide comment ]-->
<b:include cond='data:post.allowComments' name='post-commentButton'/>
<!--[ Delete tag below to disable show/hide comment ]-->
<!--<b:include cond='data:post.allowComments' name='post-commentButton'/>-->
Widget Label
Menentukan Jumlah Label yang Muncul Pertama Kali
Setelan bawaan widget Label pada semua tema hanya akan menampilkan 6 label dan menyembunyikan lainnya dengan fungsi toggle show/hide, aturan ini berlaku untuk label dengan gaya Cloud ataupun List(daftar).
Untuk merubah setelan ini atau menonaktifkan fungsi show/hide pada label silahkan ikuti panduan ini:
- Pada dashboard Blogger, klik Tema,
- klik icon pada tombol Sesuaikan,
- klik Edit HTML, Anda akan diarahkan ke halaman pengeditan,
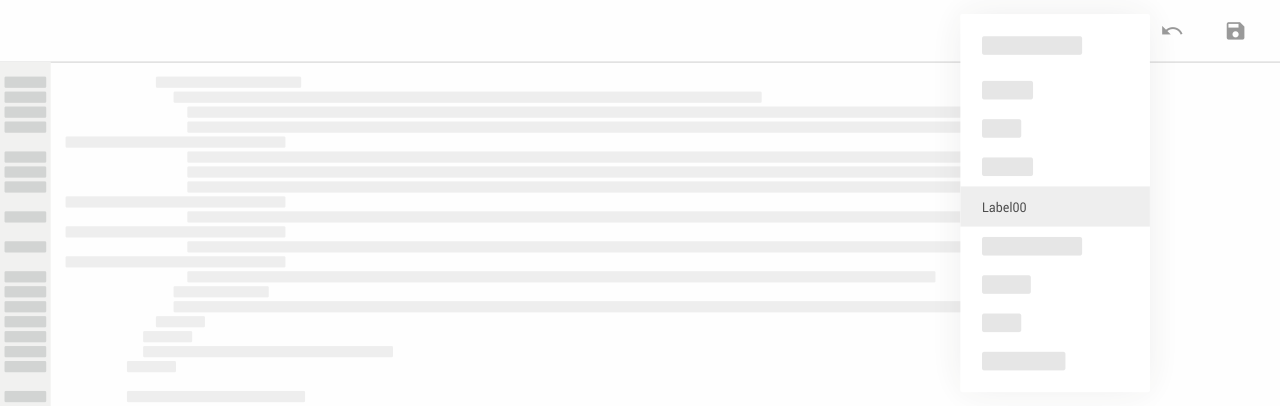
- klik icon temukan widget dengan nama Label00 seperti pada gambar di bawah:

<b:includable id='cloud'>
...
<!--[ Only show 6 label ]-->
<b:if cond='data:tags <= 5'>
...
</b:if>
<!--[ Hide another label from 7th list ]-->
<b:if cond='data:tags == 6'>
...
...
...
<!--[ Show label from 7th list ]-->
<b:if cond='data:alltags >= 6'>
...
...
...
</b:if>
...
...
<label aria-label='Show labels' class='lbM' expr:data-hide='data:messages.showLess' expr:data-show='data:messages.showMore' expr:data-text='"(+" + (data:labels.length - 6) + ")"' for='lbAl-1'/>
...
...
...
</b:includable>
<b:includable id='list'>
<ul>
...
<!--[ Only show 6 label ]-->
<b:if cond='data:tags <= 5'>
...
</b:if>
...
</ul>
...
<!--[ Hide another label from 7th list ]-->
<b:if cond='data:tags == 6'>
...
...
...
<!--[ Show label from 7th list ]-->
<b:if cond='data:alltags >= 6'>
...
</b:if>
...
...
<label aria-label='Show labels' class='lbM' expr:data-hide='data:messages.showLess' expr:data-show='data:messages.showMore' expr:data-text='"(+" + (data:labels.length - 6) + ")"' for='lbAl-2' role='button'/>
...
</b:if>
...
</b:includable>
- Perintah looping pada Blogger dimulai dari angka 0.
<b:if cond='data:tags <= 5'>— Kode utama untuk membatasi menampilkan hanya 6 label pertama.<b:if cond='data:tags == 6'>— Menampilkan fungsi toggle show/hide pada looping atau urutan label ke-7.<b:if cond='data:alltags >= 6'>— Menampilkan sisa label dari urutan ke-7 dan seterusnya.(data:labels.length - 6)— Menghitung jumlah seluruh label dikurangi 6.
Menampilkan Semua Label atau Nonaktifkan Fitur 'Show more/Show less'
Untuk menonaktifkan fitur ini ada beberapa kode yang harus Anda hapus, tepatnya adalah kode yang ditandai blok warna di bawah ini:
<b:includable id='cloud'>
...
<!--[ Only show 6 label ]-->
<b:if cond='data:tags <= 5'>
<div class='lbSz'>
<b:class expr:name='"s-" + data:label.cssSize'/>
<b:tag class='lbN' expr:name='data:blog.url != data:label.url ? "a" : "div"'>
...
</b:tag>
</div>
</b:if>
<!--[ Hide another label from 7th list ]-->
<b:if cond='data:tags == 6'>
...
</b:if>
...
</b:includable>
<b:includable id='list'>
...
...
<!--[ Only show 6 label ]-->
<b:if cond='data:tags <= 5'>
<li>
<b:tag class='lbN' expr:name='data:blog.url != data:label.url ? "a" : "div"'>
...
</b:tag>
</li>
</b:if>
...
...
<b:loop index='tags' values='data:labels' var='label'>
<!--[ Hide another label from 7th list ]-->
<b:if cond='data:tags == 6'>
...
</b:if>
</b:loop>
</b:includable>
Hanya hapus kode yang ditandai saja.
Mengubah Kalimat 'Show more/Show less' pada Widget Label
<label aria-label='Show labels' class='lbM' expr:data-hide='data:messages.showLess' expr:data-show='data:messages.showMore' expr:data-text='"(+" + (data:labels.length - 6) + ")"'/>
Kami menggunakan kalimat bawaan Blogger data:messages yang akan berubah sesuai dengan bahasa yang dipilih pada setelan Blogger, bagian yang ditandai pada kode di atas adalah kode yang harus Anda ubah.
expr:data-hide='data:messages.showLess'— Ubah menjadidata-hide='Sembunyikan'expr:data-show='data:messages.showMore'— Ubah menjadidata-show='Tampilkan yang lain'
Menambahkan Blok Warna pada Label Mode List/Daftar
Di versi terbaru sekarang Anda bisa merubah gaya widget Label List(daftar), terdapat 2 gaya yang tersedia, untuk mencobanya silahkan temukan kode dibawah ini:
<!--[ delete the comment tag below if you want to change style Label List ]-->
<b:class name='bg'/>
Hapus atau nonaktifkan kode di atas dengan tag comment <!-- --> untk mengganti gaya widget Label List.
Widget Profile
Aktifkan/Nonaktifkan Link Menuju Halaman Profil Blogger
Widget Profile dalam Blogger terbagi 2 macam: widget Profile Individual dan Profile Team. Jika hanya terdapat satu admin atau penulis di blog maka Profile Individual yang ditampilkan. Jika lebih dari satu penulis maka Profile Team yang akan ditampilkan.
Dalam widget Profile, setiap nama penulis akan otomatis mengarah ke halaman profil Blogger, untuk menjaga privasi Anda bisa menonaktifkan link ini dengan cara mengganti kode di bawah ini:
<b:include name='userProfileLink'/>
<b:include name='userProfileNameOnly'/>
Widget Slider
Ukuran Gambar yang Direkomendasikan
1920px * 780px adalah ukuran terbaik yang kami sarankan untuk kualitas gambar yang lebih maksimal dan responsive di semua ukuran layar.
Apakah Bisa Menambahkan Jumlah Gambar Pada Slider?
Untuk saat ini gambar yang bisa ditampilkan terbatas hanya 4 gambar, Anda tidak bisa menambahkan lebih dari ini.
Sembunyikan Widget Slider
Anda bisa menyembunyikan widget ini langsung dari Tata letak Blogger, terdapat 4 widget yang harus Anda sembunyikan untuk menonaktifkan slider secara menyeluruh.
- Pada dashboard Blogger, klik Tata Letak,
- Anda akan menemukan kontainer slider-widget yang berisi 4 widget: Slider Image 01, Slider Image 02, Slider Image 03, Slider Image 04. Perhatikan gambar di bawah:
- Klik satu-persatu widget tersebut lalu nonaktifkan dengan menekan tombol switch pada 'Tampilkan widget ini'.

Widget Blog
Some guidelines for Blog Widgets or post settings, such as some custom post modes found in certain templates, activating the Dark Mode feature permanently etc.
Using FullPage Features
The Fullpage feature can be used to change the post layout or appearance of the page by removing sidebar element which aims to provide more space so that blog readers/visitors can focus more on the content.
To use it, simply add the 'Fullpage' label to your post as shown in the image below:
Of course, you can also change the label name above with another name as you wish. To do this you have to edit the HTML template first, you can find a code like this in your template and change the highlighted part:
"Fullpage"
Hint:
There's more than one of the above code in the template that you have to change all of them, use the find and replace feature to instantp editing by pressing ctrl + shift + R in the template HTML editor.
Using Sponsored Pages
Sponsored Page allows you to add paid posts (advertisements/reviews) for certain products on your blog, in this mode the author information will not be displayed.
Just like the previous feature, to use the Sponsored page you must add 'Sponsored' label in the post you want. The label name can also be changed, you can find and replace some codes as below:
"Sponsored"
Using Product Pages (Median UI Only)
The Product page is only available for Median UI template, you can see an example of how it looks here. In addition to adding 'Product' label in the post, we have also provided a post template in the product bundle which you should use for this page mode:
- Open the 'Post and Pages' folder in Google Drive,
- find the file named
Product Post.txt - copy all existing code,
- in Blogger post editor, switch to HTML mode by clicking icon and then selecting HTML View
- Paste all the code that was copied earlier into the post.
- Edit and add supporting media such as name, product image and price list before saving your post.
The label name can also be changed, you just need to find and replace some code as below:
"Product"
Activating Dark Mode Permanently
You may want to permanently use dark mode and make light mode an alternative, this may be a little difficult but you can implement this by changing some of your blog's HTML code.
The first step is to add the code below after the <body> tag:
<b:class name='drK'/>
The next step we have marked some parts of the code that you need to change along with examples, your task is just to find some code that has been marked below (the code is placed separately in some parts of the blog's HTML):
document.querySelector('#mainCont').classList.add('drK') : document.querySelector('#mainCont').classList.remove('drK')
document.querySelector('#mainCont').classList.remove('drK') : document.querySelector('#mainCont').classList.add('drK')
document.querySelector("#mainCont").classList.add("drK"):document.querySelector("#mainCont").classList.remove("drK")
document.querySelector("#mainCont").classList.remove("drK"):document.querySelector("#mainCont").classList.add("drK")
Activating Grid Mode Permanently (Fletro Pro Only)
In Fletro Pro template you will find an additional feature that allows you to change the post layout from List(default) to Grid, however you may want to use Grid mode permanently, not much different from changing Darkmode you have to add and replace some of the code below this in your blog's HTML code:
First, add the code below right after the <body> tag:
<b:class cond='data:view.isMultipleItems' name='grD'/>
Second, find and replace the following two codes according to the example shown:
document.querySelector('#mainCont').classList.add('grD') : document.querySelector('#mainCont').classList.remove('grD')
document.querySelector('#mainCont').classList.remove('grD') : document.querySelector('#mainCont').classList.add('grD')
document.querySelector("#mainCont").classList.add("grD"):document.querySelector("#mainCont").classList.remove("grD")
document.querySelector("#mainCont").classList.remove("grD"):document.querySelector("#mainCont").classList.add("grD")
Changing the Maximum Number of Lines in Post Title and Snippet
We limit the maximum number of lines for post titles with a limit of 3 lines and summary/snippets of posts with a limit of 2 lines on the home page, posts with long titles may be truncated. If you don't want this to happen, replace the CSS code marked below:
.aTtl a, .pSnpt{color:inherit; display:-webkit-box;-webkit-line-clamp:3; ... }

.pSnpt{-webkit-line-clamp:2; ... }
- Change the numbers
3and2in the code above to determine the maximum line limit, - Change
display:-webkit-box;bedisplay:block;to disable the max row limit.
Post Timestamp Format
Post timestamp writing is set by default with MMM d, y format, you can't change this format via Layout or Blogger Settings.
We've done our research and determined this format is the most concise and easy for readers to understand, if you don't like this format the only way to change it is to edit your HTML template.
Before that, please study the date format in HTML on the page: unicode.org
Next in the HTML template, please look for the code MMM d, y, MMMM d, y, MMM d, YYYY, MMMM d, YYYY. Each template may have a different code, so look for one of those codes. An example of complete writing in an HTML template is like this:
<time class='aTtmp pTtmp pbl' expr:data-text='format(data:post.date, "MMM d, y")' expr:datetime='data:post.date.iso8601' expr:title='"Published: " + data:post.date format "MMMM d, y"'/>
Hide the Image Caption in Post Summary (Snippet)
To hide image captions in post snippets, you must find and change the code below as in the example:
<b:includable id='postEntrySnippet'>
  <b:eval expr='snippet(data:post.snippets.long, {length: 150, links: false, linebreaks: false})'/>
  <!--<b:eval expr='snippet(data:post.body, {length: 90, links: false, linebreaks: false})'/>-->
</b:includable>
<b:includable id='postEntrySnippet'>
  <!--<b:eval expr='snippet(data:post.snippets.long, {length: 150, links: false, linebreaks: false})'/>-->
  <b:eval expr='snippet(data:post.body, {length: 90, links: false, linebreaks: false})'/>
</b:includable>
It should be noted that changing the code above will also result in certain tags being read in the post snippet. You may encounter an Inaligned Post Listing Display error when using this feature.
Disable Post Update Date
In our theme the post date will automatically change based on the last date the post was updated, this is important to notify readers that the article they are reading is not outdated.
We don't understand if anyone wants to remove this feature on their blog, but here's the code that must be changed to disable this feature:
<b:includable id='postTimestamps'>
<b:if cond='data:post.lastUpdated != data:post.date'>
<time class='aTtmp pTtmp upd' data-date='Updated:' expr:data-text='format(data:post.lastUpdated, "MMMM d, YYYY")' expr:data-time='format(data:post.lastUpdated, "MMM d, YYYY")' expr:datetime='data:post.lastUpdated.iso8601' expr:title='"Last updated: " + data:post.lastUpdated format "MMMM d, YYYY"'/>
<b:else/>
<time class='aTtmp pTtmp pbl' expr:data-text='format(data:post.date, "MMMM d, YYYY")' expr:data-time='format(data:post.lastUpdated, "MMM d, YYYY")' expr:datetime='data:post.date.iso8601' expr:title='"Published: " + data:post.date format "MMMM d, YYYY"'/>
</b:if>
</b:includable>
<b:includable id='postTimestamps'>
<time class='aTtmp pTtmp pbl' expr:data-text='format(data:post.date, "MMMM d, YYYY")' expr:data-time='format(data:post.lastUpdated, "MMM d, YYYY")' expr:datetime='data:post.date.iso8601' expr:title='"Published: " + data:post.date format "MMMM d, YYYY"'/>
</b:includable>
Disable Reading Time Feature
The Reading Time feature functions to determine the estimated time spent reading the entire article, the time displayed automatically changes according to the length or number of characters in an article.
However, you can also disable this feature by removing the code as below:
<!--[ Reading time ]-->
<div class='pRd pIn'><bdi id='rdTime'/></div>
<script>/*<![CDATA[*/ function get_text(el) { ... maincount = Math.round(counted); document.getElementById('rdTime').innerHTML = maincount + ' min read'; /*]]>*/</script>
Disable Description Under Post Title
This description will automatically appear if the search description on post is enabled, this description will also appear in search results later. Disabling or hiding this feature will not remove the post description from search results.
Find and delete the code below to hide this feature:
<!-- Post Description -->
<div class='pDesc'><data:blog.metaDescription/></div>
Changing the Layout of Related Posts Widget
The Related Articles feature is available in 4 different styles, by default the style used in the initial setting is style number 4, you can change it by changing the numbers marked in the code below:
// Change the related post style, there are 4 styles available
widgetStyle: 4,
Disable Pop-ups (Sticky) and Show/Hide Buttons in Comments
We provide 3 alternative styles for Blogger comments, you can choose to keep the floating style or use a simple view.
To disable the floating comment feature, please find and delete or disable the tag below by adding comment <!-- and --> tags.
<!--[ Delete tag below to disable Pop-up comments ]-->
<b:class name='cmBr fixL'/>
<!--[ Delete tag below to disable Pop-up comments ]-->
<!--<b:class name='cmBr fixL'/>-->
You can also use a simple comment view without the show/hide button by disabling the following tag:
<!--[ Delete tag below to disable show/hide comment ]-->
<b:include cond='data:post.allowComments' name='post-commentButton'/>
<!--[ Delete tag below to disable show/hide comment ]-->
<!--<b:include cond='data:post.allowComments' name='post-commentButton'/>-->
Widget Label
Determining the Number of Labels That Appear First
The default setting of the Label widget on all themes will only show 6 labels and hide the others with show/hide toggle function, this rule applies to labels with Cloud or List style.
To change this setting or disable the show/hide function on labels, you can follow this guide:
- On Blogger dashboard, click Themes,
- click icon on the Customize button,
- click Edit HTML, you will be redirected to the editing page,
- click icon and find widget with the name Label00 as in the image below:
<b:includable id='cloud'>
...
<!--[ Only show 6 label ]-->
<b:if cond='data:tags <= 5'>
...
</b:if>
<!--[ Hide another label from 7th list ]-->
<b:if cond='data:tags == 6'>
...
...
...
<!--[ Show label from 7th list ]-->
<b:if cond='data:alltags >= 6'>
...
...
...
</b:if>
...
...
<label aria-label='Show labels' class='lbM' expr:data-hide='data:messages.showLess' expr:data-show='data:messages.showMore' expr:data-text='"(+" + (data:labels.length - 6) + ")"' for='lbAl-1'/>
...
...
...
</b:includable>
<b:includable id='list'>
<ul>
...
<!--[ Only show 6 label ]-->
<b:if cond='data:tags <= 5'>
...
</b:if>
...
</ul>
...
<!--[ Hide another label from 7th list ]-->
<b:if cond='data:tags == 6'>
...
...
...
<!--[ Show label from 7th list ]-->
<b:if cond='data:alltags >= 6'>
...
</b:if>
...
...
<label aria-label='Show labels' class='lbM' expr:data-hide='data:messages.showLess' expr:data-show='data:messages.showMore' expr:data-text='"(+" + (data:labels.length - 6) + ")"' for='lbAl-2' role='button'/>
...
</b:if>
...
</b:includable>
- The loop command in Blogger starts at 0.
<b:if cond='data:tags <= 5'>— Main code to limit displaying only the first 6 labels.<b:if cond='data:tags == 6'>— Display toggle show/hide function on looping or 7th label sequence.<b:if cond='data:alltags >= 6'>— Displays the remaining labels from the 7th order onwards.(data:labels.length - 6)— Counting the total number of labels minus 6.
Show All Labels or Disable 'Show more/Show less' Features'
In order to disable this feature there are several codes that you must remove, to be precise the code marked in the color block below:
<b:includable id='cloud'>
...
<!--[ Only show 6 label ]-->
<b:if cond='data:tags <= 5'>
<div class='lbSz'>
<b:class expr:name='"s-" + data:label.cssSize'/>
<b:tag class='lbN' expr:name='data:blog.url != data:label.url ? "a" : "div"'>
...
</b:tag>
</div>
</b:if>
<!--[ Hide another label from 7th list ]-->
<b:if cond='data:tags == 6'>
...
</b:if>
...
</b:includable>
<b:includable id='list'>
...
...
<!--[ Only show 6 label ]-->
<b:if cond='data:tags <= 5'>
<li>
<b:tag class='lbN' expr:name='data:blog.url != data:label.url ? "a" : "div"'>
...
</b:tag>
</li>
</b:if>
...
...
<b:loop index='tags' values='data:labels' var='label'>
<!--[ Hide another label from 7th list ]-->
<b:if cond='data:tags == 6'>
...
</b:if>
</b:loop>
</b:includable>
Only delete marked codes.
Changing 'Show more/Show less' Sentence on the Label Widget
<label aria-label='Show labels' class='lbM' expr:data-hide='data:messages.showLess' expr:data-show='data:messages.showMore' expr:data-text='"(+" + (data:labels.length - 6) + ")"'/>
We use the default Blogger data:messages sentence which will change according to the language selected in the Blogger settings, the marked part of the code above is the code you have to change.
expr:data-hide='data:messages.showLess'— Change todata-hide='Sembunyikan'expr:data-show='data:messages.showMore'— Change todata-show='Tampilkan yang lain'
Adding Color Blocks to List Mode Labels
In the latest version now you can change the style of the Label List widget, there are 2 styles available, to try it find the code below:
<!--[ delete the comment tag below if you want to change style Label List ]-->
<b:class name='bg'/>
Remove or disable the code above with the comment tag <!-- --> to change the style of Label List widget.
...
Widget Profile
Enable/Disable Link To Blogger Profile Page
Profile widgets in Blogger are divided into 2 types: Individual Profile widgets and Team Profile widgets. If there's only one admin or author on the blog, the Individual Profile will be displayed. If there is more than one author, the Team Profile will be displayed.
In the Profile widget, each author's name will automatically be directed to the Blogger profile page, to maintain privacy you can disable this link by changing the code below:
<b:include name='userProfileLink'/>
<b:include name='userProfileNameOnly'/>
Widget Slider
Recommended Image Size
1920px * 780px is the best size we recommend for maximum image quality and responsiveness on all screen sizes.
Is it possible to increase the number slider?
For now the images that can be displayed are limited to only 4 images, you can't add more than this.
Hide Slider Widget
You can hide this widget directly from Blogger Layout, there are 4 widgets that you have to hide to disable the slider completely.
- On the Blogger dashboard, click Layout,
- You will find a slider-widget containing 4 widgets: Slider Image 01, Slider Image 02, Slider Image 03, Slider Image 04. Look at the image below:
- Click on the widgets one by one and then disable them by pressing the switch button on 'Show this widget'.