Customization Guide
Easily customize the style, color and background of the theme.
In the latest update, we have made optimizations to make it easier for users to customize the theme they are using, now some basic colors, font size, component length can be adjusted through the Blogger Theme Editor. We will continue to work to enhance this feature with every update.
Blogger Theme Editor
Open the Blogger Theme Editor, click here if you forgot how.
Change address bar color (mobile only)
In the first group with 'Address bar' title you can change the color bar on mobile browsers, for now the supported browsers are only Chrome and Safari, we don't know if other browsers support this feature or not.
When the default color scheme is Dark, the address bar color will also change, this cannot be avoided.
Change default font-size and link color
In the advanced tab, you will find the 'Basic and color' group which collects all the basic settings including font size and color of text, links, background as well as border color. We use a base font-size of 14px with a maximum of 18px, try to customize the color according to your taste.
Change background-color
The background colors are separated into groups, each component has its own background color, changes to one component will not affect the others.
Change darkMode color scheme
This may not seem that important, but not everyone has the same taste in colors, so we open up the opportunity for those of you who want to try changing the color of Dark Mode. We recommend colorhunt.co for color scheme reference.
Change the width/height component
Not only colors, you can also change the width or height of components such as Header height, Sidebar width, Post width, etc. All are collected in different groups based on the component type.
Resize header logo image
Now you don't have to complain about small header image size, you don't need to edit HTML to adjust the header image size, go to the 'Logo' group and set the maximum image size according to your taste.
Change the post layout style
This is the best part of our improvements, we've had a lot of questions about how to change the style of posts. In response, we're giving users flexibility to customize the appearance according to their own tastes.
First of all, head over to 'Post: Style' group, you will find several options such as changing padding or background color. To make it easier for you to understand how this works, here we explain the function of each option:
- Post padding, to set space around the element content, within the specified borders.

- Post padding (mobile only), the same as the first option but only works for mobile displays, conveniently the first option will be replaced with this when the page is accessed through mobile.
- Post content padding, sets the space between content and the side of components, unlike the first option, this option only sets the distance for text content, not for thumbnails.
- Post color, to specify the text color.
- Post background, to set the background color.
- Post border-width, to set the border thickness with a range of 1-2px, the default is 0px.
- Post border-radius, to set the corner radius of the component, the maximum value for this option is 20px.
- Post border-color, to set the border color, this option doesn't work if the border-width value is 0px.
- Post box-shadow, to set the shadow color of the component, it's recommended to use a light gray color.
- Post box-shadow(hover), sets the shadow color when the cursor hovers over the component, it's recommended to enable this option if the box-shadow option is active.


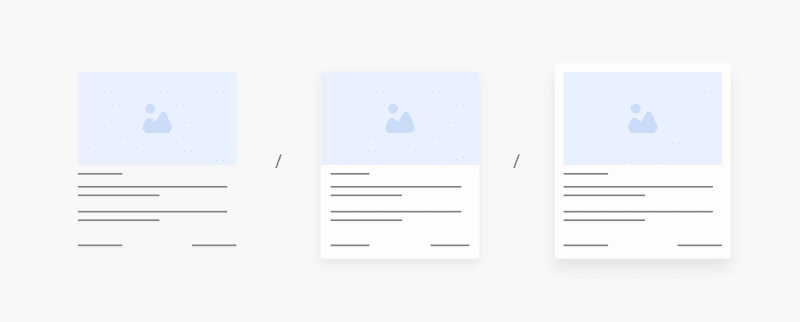
With the right customization you can create a variety of post styles, here are some examples of post styles that can be created:
CSS Variable
Not all customizations are available on the Blogger Theme Editor, most of them have to be edited via HTML such as default text, post font size, etc. AMP version also doesn't support editing via Theme Editor, so you have to go to Edit HTML for more complete customizations.
Take a look at the CSS section of the theme, you will find similar variable code below:
/* Variable */
:root{
/* var: Font */
--fontSize: $(fontSize) ;
--fontHead: 'Noto Sans', sans-serif ;
--fontBody: 'Noto Sans', sans-serif ;
--fontBody-alt: 'Fira Sans', sans-serif ;
--fontCode: 'Fira Mono', sans-serif ;

--head-H1: 2rem ;
--head-H2: 1.8rem ;
--head-H3: 1.7rem ;
--head-H4: 1.6rem ;
--head-H5: 1.5rem ;
--head-H6: 1.4rem ;
--head-fontWg: 400 ;
}
.nB{

/* var: Light-mode */
...

/* var: Dark-mode */
...

/* var: Theme */
...

/* var: Basic, button, input */
...

/* var: Icons */
--iconWidth: 35px ;
--iconHeight: 35px ;

/* var: Pop-up */
--closeHeight-phone: 60px ;

/* var: Header */
...

/* var: Sidenav */
...

/* var: Sidebar */
...

/* var: Content */
...

/* var: Footer */
...

/* var: Post style */
...

/* var: Post font */
--postTitle-font: 2.6rem ;
--postTitle-fontPhone: 2rem ;
--postTitle-fontWg: 400 ;
--postTitle-fontItems: 1.2em ;
--postTitle-fontItemsPhone: 1.1em ;
--postDescription-font: 1.13rem ;
--postDescription-fontPhone: 1.072rem ;
--postBody-font: 1.143rem ;
--postBody-fontPhone: 1.072rem ;

/* var: Post typo */
--postBreak: 3em ;
--postImageBd-radius: 2px;
--lineHeight: 1.7 ;
--lineSpacing: 1.8em ;
--tableBg-color: rgb(246 246 246 / 80%) ;

/* var: Post thumbnail */
--thumbnailRatio: 56.25% ; /* According to aspect-ratio 16:9 (divide 9 by 16 = 0.5625) */
--thumbnailRatio-box: 100% ;

/* var: Post syntax */
--synC: #2f3337 ;
--synBg: #f8f9fa ;
--synOrange: #b75501 ;
--synBlue: #015692 ;
--synGreen: #54790d ;
--synRed: #f15a5a ;
--synGray: #656e77 ;
--synGold: #72621d ;
--synPurple: #803378 ;
--synBd-line: 1px ;
--synBd-radius: 4px ;
--synBd-color: #d2d3d7 ;

/* var: Post component */
--noteAfter: '\002A'  ;
--warnAfter: '\0021' ;
...

/* var: Widget */
--widgetTitle-font: 1.072rem ;
--widgetTitle-fontWg: 400 ;
--widgetTitle-afterD: inline-block ;
--widgetTitle-afterWd: 10px ;
--widgetTitle-afterC: var(--themeBd-color) ;
--widgetTitle-space: 20px ;

/* var: Widget notify */
...

/* var: Widget slider */
--sliderBd-radius: 4px ;
--sliderRatio: 43.75% ;

/* var: Widget featuredPosts */
--thumbnailSize: 300px ;

/* var: Widget mobileMenu */
...

/* var: Widget ToC */
...

/* var: Transition */
--tDuration: .1s ease ;
--tShowHide: opacity var(--tDuration), visibility var(--tDuration) ;

/* var: Bookmark */
--addBookmark: 'Save' ;
--removeBookmark: 'Saved' ;
--bookmarkTextLenght: 90px ;

/* var: Custom text */
--free: 'Free!' ;
--new: 'New!' ;
--breadcrumbs: '\005C' ;
--noImage: 'Null' ;
--labelComa: 'and' ;
--closeButton: 'Close' ;
--pageNext: 'Next' ;
--pagePrev: 'Back' ;
--latestUpdate: '\21BB' ;
--reply: 'Reply' ;
--replies: 'Write a reply...' ;
--readtimeBefore: '\00B7' ;
--readtimeAfter: 'min read' ;
--copyLink: 'or copy link' ;
--copied: 'Copied!' ;
--tableToc: 'Contents' ;
}
You can change the font type in variable /* var: Font */, custom text /* var: Custom text */, icon size /* var: Icons */, thumbnail size /* var: Post thumbnail */ even transition duration /* var: Transition */ and many other things.
How To Replace or Ad New Font
Getting and Embedding @font-face Code
First of all, go to Google Fonts and find a font that you like to use in the theme. For example, we use Aref Ruqaa font to display Arabic text in the Blog, below is the link we got from Google Fonts:
<link href='https://fonts.googleapis.com/css2?family=Aref+Ruqaa&display=swap' rel='stylesheet'>
Then open the url marked in the code above through your browser to get the @font-face CSS code as follows:
/* arabic */
@font-face {
  font-family: 'Aref Ruqaa';
  font-style: normal;
  font-weight: 400;
  font-display: swap;
  src: url(https://fonts.gstatic.com/s/arefruqaa/v21/WwkbxPW1E165rajQKDulIIIoVeo5.woff2) format('woff2');
  unicode-range: U+0600-06FF, U+200C-200E, U+2010-2011, U+204F, U+2E41, U+FB50-FDFF, U+FE80-FEFC;
}
/* latin-ext */
@font-face {
  font-family: 'Aref Ruqaa';
  font-style: normal;
  font-weight: 400;
  font-display: swap;
  src: url(https://fonts.gstatic.com/s/arefruqaa/v21/WwkbxPW1E165rajQKDulIIkoVeo5.woff2) format('woff2');
  unicode-range: U+0100-024F, U+0259, U+1E00-1EFF, U+2020, U+20A0-20AB, U+20AD-20CF, U+2113, U+2C60-2C7F, U+A720-A7FF;
}
/* latin */
@font-face {
  font-family: 'Aref Ruqaa';
  font-style: normal;
  font-weight: 400;
  font-display: swap;
  src: url(https://fonts.gstatic.com/s/arefruqaa/v21/WwkbxPW1E165rajQKDulIIcoVQ.woff2) format('woff2');
  unicode-range: U+0000-00FF, U+0131, U+0152-0153, U+02BB-02BC, U+02C6, U+02DA, U+02DC, U+2000-206F, U+2074, U+20AC, U+2122, U+2191, U+2193, U+2212, U+2215, U+FEFF, U+FFFD;
}
Copy and paste the above code right before ]]></b:skin> or /*]]>*/</style>. The easiest way to add CSS is through the Blogger Theme Editor:
- On Blogger dashboard, go to Themes › Customize.
- Click on Advanced tab.
- Click on dropdown menu, scroll to the bottom to find the Add CSS menu.
- Paste the CSS code in the field provided, then click Save.

Using New Fonts
After embedding the @font-face code, the font can be directly used by simply writing the font-family name with CSS. In Google Fonts, you will get instructions to write the font-familyz name, in this tutorial we use Aref Ruqaa font, here is the code we get from Google Fonts:
font-family: 'Aref Ruqaa', serif;
You can write CSS code directly (inline) or call it with className, here is an example of writing CSS directly using the style="" attribute along with the rendering results:
<p style="font-family: 'Aref Ruqaa', serif;">السلام عليكم ورحمة الله وبركاته</p>
السلام عليكم ورحمة الله وبركاته
Another alternative is to use className, this is an easier way to apply, for example we write CSS className like this:
.arabicFont{font-family: 'Aref Ruqaa', serif;}
Based on the code above, the new font can be called using class='arabicFont', for example:
<div class='arabicFont'>السلام عليكم ورحمة الله وبركاته</div>
.arabicFont{font-family: 'Aref Ruqaa', serif;}
السلام عليكم ورحمة الله وبركاته
You can also use other tags such as <p>, <span> etc.
Replacing Default Fonts in a Theme
However, you may want to use a new font as the main font instead of the default font, to apply it, find the CSS variable /* var: Font */ as below:
/* var: Font */
--fontSize: $(fontSize) ;
--fontHead: 'Noto Sans', sans-serif ;
--fontBody: 'Noto Sans', sans-serif ;
--fontBody-alt: 'Fira Sans', sans-serif ;
--fontCode: 'Fira Mono', sans-serif ;
Description:
--fontHead, used for article heading or post title.--fontBody, used for content or article content.--fontBody-alt, an alternative font used in certain titles or sentences.--fontCode, used for writing syntax code.
Replace any of the above fonts with your new embedded font, some themes may have different font.
Pada update terbaru, kami telah melakukan optimasi untuk memudahkan pengguna dalam melakukan kustomisasi tema yang mereka gunakan, kini beberapa warna dasar, ukuran font, panjang komponen dapat disesuaikan melalui Blogger Theme Editor. Kami akan terus berupaya menyempurnakan fitur ini di setiap pembaruan.
Editor Tema Blogger
Buka Editor Tema Blogger, klik di sini jika Anda lupa caranya.
Mengubah warna address bar (hanya di mobile)
Pada grup pertama dengan judul 'Address bar' Anda dapat mengubah warna bar pada browser mobile, untuk saat ini browser yang didukung hanya Chrome dan Safari, kami tidak tahu apakah browser lain mendukung fitur ini atau tidak.
Ketika skema warna default adalah Gelap, maka warna address bar juga akan berubah, hal ini tidak dapat dihindari.
Mengubah ukuran font dan warna link bawaan
Pada tab lanjutan, Anda akan menemukan grup 'Basic and color' yang mengumpulkan semua pengaturan dasar termasuk ukuran font dan warna teks, tautan, latar belakang, serta warna perbatasan. Kami menggunakan ukuran font dasar 14px dengan maksimum 18px, coba sesuaikan warna sesuai selera Anda.
Mengubah warna latar
Warna latar belakang dipisahkan ke dalam beberapa kelompok, masing-masing komponen memiliki warna latar belakangnya sendiri, perubahan pada satu komponen tidak akan memengaruhi komponen lainnya.
Mengubah skema warna darkMode
Hal ini mungkin tampak tidak terlalu penting, tetapi tidak semua orang memiliki selera warna yang sama, jadi kami membuka kesempatan bagi Anda yang ingin mencoba mengubah warna Mode Gelap. Kami merekomendasikan colorhunt.co untuk referensi skema warna.
Mengubah lebar/tinggi komponen
Tidak hanya warna, Anda juga bisa mengubah lebar atau tinggi komponen seperti tinggi Header, lebar Sidebar, lebar maksimal Postingan, dll. Semua dikumpulkan dalam kelompok yang berbeda berdasarkan jenis komponen.
Mengubah ukuran logo header
Sekarang Anda tidak perlu mengeluh dengan ukuran gambar header yang kecil, Anda tidak perlu mengedit HTML untuk mengatur ukuran gambar header, cukup masuk ke grup 'Logo' dan atur ukuran gambar maksimal sesuai selera Anda.
Mengubah gaya tata letak postingan
Ini adalah bagian terbaik dari pembaruan kami, kami memiliki banyak pertanyaan tentang cara mengubah gaya postingan. Untuk menjawabnya, kami memberikan fleksibilitas kepada pengguna untuk menyesuaikan tampilan sesuai dengan selera mereka.
Pertama-tama, pergilah ke grup 'Post: Style', Anda akan menemukan beberapa opsi seperti mengubah padding atau warna latar belakang. Untuk memudahkan Anda memahami cara kerjanya, berikut ini kami jelaskan fungsi masing-masing opsi:
- Post padding, untuk mengatur ruang di sekitar konten elemen, di dalam batas yang ditentukan.
- Post padding (mobile only), sama seperti opsi pertama namun hanya berfungsi untuk tampilan seluler, dengan mudahnya opsi pertama akan digantikan dengan opsi ini ketika halaman diakses melalui seluler.
- Post content padding, mengatur jarak antara konten dan sisi komponen, tidak seperti opsi pertama, opsi ini hanya mengatur jarak untuk konten teks, tidak untuk thumbnail.
- Post color, untuk menentukan warna teks.
- Post background, untuk mengatur warna latar belakang.
- Post border-width, untuk mengatur ketebalan border dengan rentang 1-2px, defaultnya adalah 0px.
- Post border-radius, untuk mengatur radius sudut komponen, nilai maksimum untuk opsi ini adalah 20px.
- Post border-color, untuk mengatur warna garis tepi, opsi ini tidak berfungsi jika nilai border-width adalah 0px.
- Post box-shadow, untuk mengatur warna bayangan komponen, disarankan untuk menggunakan warna abu-abu terang.
- Post box-shadow(hover), mengatur warna bayangan ketika kursor melayang di atas komponen, disarankan untuk mengaktifkan opsi ini jika opsi box-shadow aktif.
Dengan kustomisasi yang tepat Anda dapat membuat berbagai macam gaya postingan, berikut adalah beberapa contoh gaya postingan yang dapat dibuat:
CSS Variable
Tidak semua kustomisasi tersedia di Editor Tema Blogger, sebagian besar harus diedit melalui HTML seperti teks default, ukuran font posting, dll. Versi AMP juga tidak mendukung pengeditan melalui Theme Editor, jadi Anda harus pergi ke Edit HTML untuk kustomisasi yang lebih lengkap.
Lihatlah pada bagian CSS tema, Anda akan menemukan kode variabel serupa di bawah ini:
/* Variable */
:root{
/* var: Font */
--fontSize: $(fontSize) ;
--fontHead: 'Noto Sans', sans-serif ;
--fontBody: 'Noto Sans', sans-serif ;
--fontBody-alt: 'Fira Sans', sans-serif ;
--fontCode: 'Fira Mono', sans-serif ;

--head-H1: 2rem ;
--head-H2: 1.8rem ;
--head-H3: 1.7rem ;
--head-H4: 1.6rem ;
--head-H5: 1.5rem ;
--head-H6: 1.4rem ;
--head-fontWg: 400 ;
}
.nB{

/* var: Light-mode */
...

/* var: Dark-mode */
...

/* var: Theme */
...

/* var: Basic, button, input */
...

/* var: Icons */
--iconWidth: 35px ;
--iconHeight: 35px ;

/* var: Pop-up */
--closeHeight-phone: 60px ;

/* var: Header */
...

/* var: Sidenav */
...

/* var: Sidebar */
...

/* var: Content */
...

/* var: Footer */
...

/* var: Post style */
...

/* var: Post font */
--postTitle-font: 2.6rem ;
--postTitle-fontPhone: 2rem ;
--postTitle-fontWg: 400 ;
--postTitle-fontItems: 1.2em ;
--postTitle-fontItemsPhone: 1.1em ;
--postDescription-font: 1.13rem ;
--postDescription-fontPhone: 1.072rem ;
--postBody-font: 1.143rem ;
--postBody-fontPhone: 1.072rem ;

/* var: Post typo */
--postBreak: 3em ;
--postImageBd-radius: 2px;
--lineHeight: 1.7 ;
--lineSpacing: 1.8em ;
--tableBg-color: rgb(246 246 246 / 80%) ;

/* var: Post thumbnail */
--thumbnailRatio: 56.25% ; /* According to aspect-ratio 16:9 (divide 9 by 16 = 0.5625) */
--thumbnailRatio-box: 100% ;

/* var: Post syntax */
--synC: #2f3337 ;
--synBg: #f8f9fa ;
--synOrange: #b75501 ;
--synBlue: #015692 ;
--synGreen: #54790d ;
--synRed: #f15a5a ;
--synGray: #656e77 ;
--synGold: #72621d ;
--synPurple: #803378 ;
--synBd-line: 1px ;
--synBd-radius: 4px ;
--synBd-color: #d2d3d7 ;

/* var: Post component */
--noteAfter: '\002A'  ;
--warnAfter: '\0021' ;
...

/* var: Widget */
--widgetTitle-font: 1.072rem ;
--widgetTitle-fontWg: 400 ;
--widgetTitle-afterD: inline-block ;
--widgetTitle-afterWd: 10px ;
--widgetTitle-afterC: var(--themeBd-color) ;
--widgetTitle-space: 20px ;

/* var: Widget notify */
...

/* var: Widget slider */
--sliderBd-radius: 4px ;
--sliderRatio: 43.75% ;

/* var: Widget featuredPosts */
--thumbnailSize: 300px ;

/* var: Widget mobileMenu */
...

/* var: Widget ToC */
...

/* var: Transition */
--tDuration: .1s ease ;
--tShowHide: opacity var(--tDuration), visibility var(--tDuration) ;

/* var: Bookmark */
--addBookmark: 'Save' ;
--removeBookmark: 'Saved' ;
--bookmarkTextLenght: 90px ;

/* var: Custom text */
--free: 'Free!' ;
--new: 'New!' ;
--breadcrumbs: '\005C' ;
--noImage: 'Null' ;
--labelComa: 'and' ;
--closeButton: 'Close' ;
--pageNext: 'Next' ;
--pagePrev: 'Back' ;
--latestUpdate: '\21BB' ;
--reply: 'Reply' ;
--replies: 'Write a reply...' ;
--readtimeBefore: '\00B7' ;
--readtimeAfter: 'min read' ;
--copyLink: 'or copy link' ;
--copied: 'Copied!' ;
--tableToc: 'Contents' ;
}
Anda dapat mengubah jenis font pada variabel /* var: Font */, teks kustom /* var: Custom text */, ukuran ikon /* var: Icons */, ukuran thumbnail /* var: Post thumbnail */ bahkan durasi transisi /* var: Transition */ dan banyak hal lainnya.
Bagaimana Cara Mengganti atau Menambahkan Font Baru
Mendapatkan dan Menyematkan Kode @font-face
Pertama-tama, buka Google Fonts dan temukan font yang ingin Anda gunakan dalam tema. Sebagai contoh, kami menggunakan font Aref Ruqaa untuk menampilkan teks Arab di blog, di bawah ini adalah link yang kami dapatkan dari Google Fonts:
<link href='https://fonts.googleapis.com/css2?family=Aref+Ruqaa&display=swap' rel='stylesheet'>
Kemudian buka url yang ditandai pada kode di atas melalui browser untuk mendapatkan kode CSS @font-face seperti berikut:
/* arabic */
@font-face {
  font-family: 'Aref Ruqaa';
  font-style: normal;
  font-weight: 400;
  font-display: swap;
  src: url(https://fonts.gstatic.com/s/arefruqaa/v21/WwkbxPW1E165rajQKDulIIIoVeo5.woff2) format('woff2');
  unicode-range: U+0600-06FF, U+200C-200E, U+2010-2011, U+204F, U+2E41, U+FB50-FDFF, U+FE80-FEFC;
}
/* latin-ext */
@font-face {
  font-family: 'Aref Ruqaa';
  font-style: normal;
  font-weight: 400;
  font-display: swap;
  src: url(https://fonts.gstatic.com/s/arefruqaa/v21/WwkbxPW1E165rajQKDulIIkoVeo5.woff2) format('woff2');
  unicode-range: U+0100-024F, U+0259, U+1E00-1EFF, U+2020, U+20A0-20AB, U+20AD-20CF, U+2113, U+2C60-2C7F, U+A720-A7FF;
}
/* latin */
@font-face {
  font-family: 'Aref Ruqaa';
  font-style: normal;
  font-weight: 400;
  font-display: swap;
  src: url(https://fonts.gstatic.com/s/arefruqaa/v21/WwkbxPW1E165rajQKDulIIcoVQ.woff2) format('woff2');
  unicode-range: U+0000-00FF, U+0131, U+0152-0153, U+02BB-02BC, U+02C6, U+02DA, U+02DC, U+2000-206F, U+2074, U+20AC, U+2122, U+2191, U+2193, U+2212, U+2215, U+FEFF, U+FFFD;
}
Salin dan tempelkan kode di atas tepat sebelum ]]></b:skin> atau /*]]>*/</style>. Cara termudah untuk menambahkan CSS adalah melalui Editor Tema Blogger:
- Di dasbor Blogger, buka Tema › Sesuaikan.
- Klik tab Lanjutan.
- Klik menu dropdown, gulir ke bagian bawah untuk menemukan menu Tambahkan CSS.
- Tempelkan kode CSS di kolom yang tersedia, lalu klik Simpan.
Menggunakan Font Baru
Setelah menyematkan kode @font-face, font tersebut dapat langsung digunakan hanya dengan menuliskan nama font-family dengan CSS. Pada Google Fonts, Anda akan mendapatkan instruksi untuk menuliskan nama font-family, pada tutorial kali ini kami menggunakan font Aref Ruqaa, berikut kode yang kami dapatkan dari Google Fonts:
font-family: 'Aref Ruqaa', serif;
Anda dapat menuliskan kode CSS secara langsung (inline) atau memanggilnya dengan className, berikut adalah contoh penulisan CSS secara langsung menggunakan atribut style="" beserta hasil rendernya:
<p style="font-family: 'Aref Ruqaa', serif;">السلام عليكم ورحمة الله وبركاته</p>
السلام عليكم ورحمة الله وبركاته
Alternatif lainnya adalah dengan menggunakan className, ini merupakan cara yang lebih mudah untuk diterapkan, sebagai contoh kita tuliskan CSS className seperti ini:
.arabicFont{font-family: 'Aref Ruqaa', serif;}
Berdasarkan kode di atas, font baru dapat dipanggil dengan menggunakan class='arabicFont', misalnya:
<div class='arabicFont'>السلام عليكم ورحمة الله وبركاته</div>
.arabicFont{font-family: 'Aref Ruqaa', serif;}
السلام عليكم ورحمة الله وبركاته
Anda juga dapat menggunakan tag lain seperti <p>, <span> dll.
Mengganti Font Bawaan pada Tema
Anda mungkin ingin menggunakan font baru sebagai font utama dan menggantikan font default, untuk menerapkannya, cari variabel CSS /* var: Font */ seperti di bawah ini:
/* var: Font */
--fontSize: $(fontSize) ;
--fontHead: 'Noto Sans', sans-serif ;
--fontBody: 'Noto Sans', sans-serif ;
--fontBody-alt: 'Fira Sans', sans-serif ;
--fontCode: 'Fira Mono', sans-serif ;
Keterangan:
--fontHead, digunakan untuk judul artikel atau judul postingan.--fontBody, digunakan untuk konten atau isi artikel.--fontBody-alt, font alternatif yang digunakan pada judul atau kalimat tertentu.--fontCode, digunakan untuk menulis kode syntax.
Ganti salah satu font di atas dengan font baru yang sudah disematkan, beberapa tema mungkin memiliki font yang berbeda.