Optimization Guide
A few tips to improve the site's performance and accessibility and to improve the user experience.
Add rich snippet thumbnails
We used to call it Open Graph, this customization is useful for adding snippet images when web pages are shared to social media platforms such as Whatsapp, Facebook or Twitter.
By default, the snippet image will only appear on the post page by fetching data from the first image in the article, but the snippet image doesn't appear when the homepage link is shared to social media, this is because there's no image data that can be fetched by the server, for that you have to add the image url manually, in Edit HTML find code like this:
<b:comment>Replace Add_your_image_url_here with your image url</b:comment>
<b:with value='{url: "Add_your_image_url_here"}' var='thumb'>
<meta expr:content='data:thumb.url' property='og:image'/>
<meta expr:content='data:thumb.url' name='twitter:image:src'/>
</b:with>
Replace the code marked Add_your_image_url_here with your image url. We recommend using images with 16:9 ratio or the equivalent of 1280px*720px.
To get the image url, upload it first through the post editor, then right click on the image › Copy image address.
Add/replace default schema thumbnails
To avoid errors in Google Rich Results Test we added a default thumbnail for the home page and a logo from jagodesain.com in the JSON blog schema, we do not intend or aim for anything other than that, also this doesn't affect your site much but you can always change it whenever you want, find code like this:
<b:includable id='postMetadataJSONImage'>
"image": {
...
/* Get the first image, otherwise no default image will be shown */
"url": "<b:eval expr='(data:post.featuredImage ? resizeImage(data:post.featuredImage, 1200, "1200:630") : "https://blogger.googleusercontent.com/img/b/R29vZ2xl/AVvXsEjB3ycrdFFjMviBoUGCOg09Atonnuj40E6socEJJIWDs6sysO-vBDc26KLj2aQsHkeAmuM400e8Jdsy0-T0TYoCpZ2Bt76Xk01OL5Pa7-pCDntGl-YtzPFJrZL9ls_7O57LMy2H0R0HBYA/s1600/jagotheme-img.png")'/>",
"height": <b:eval expr='data:post.featuredImage ? 630 : 420'/>,
"width": 1200
},
</b:includable>
<b:includable id='postMetadataJSONPublisher'>
"publisher": {
...,
...,
"logo": {
"@type": "ImageObject",
"url": "https://blogger.googleusercontent.com/img/b/R29vZ2xl/AVvXsEie8b3EU9IO25um9FwH5dnzEVDBzxaro-jwYmwr7kCaAQ8ZQP-7Y3QA-9QXhr6KkdI0oXRwy_b-xnNWmrkK2aCjzzU0D2CnefW24OaBtna5qW0mPpcd8bylGqBEYy0KilL50ziSJr4fb8E/s0/jd-logo.png",
"width": 297,
"height": 45
}
},
</b:includable>
You will find several similar codes in different places, replace the marked part of the code above with your image url, there's no recommended image size in this setting, but it would be better to use 1200*420 according to the width and height values in the code above, and 297*45 for the logo, you can also change the size options to be suitable for your image by changing the width and height values marked in the code above.
Use lazyLoad on images
Images become one of the reasons for decreasing Pagespeed score, make sure every image in your post is using lazy load, web.dev also suggests the same thing. See the Components page for user guides.
How to add thumbnails without showing them in posts?
You may want to create a post without images, but however there must be at least one image in your post that will be used as a thumbnail, to anticipate this use the code below at the top of the post:
<!--<div class='separator hidden'>
  <img alt='image_title' src='https://blogger.googleusercontent.com/img/.../image.png'/>
</div>-->
The comment tag <!-- --> makes the image read only as text and will not appear on the post page, but is displayed as a post thumbnail. Make sure you have also changed the image url along with the alt='' attribute.
Add labels to each post
The advantages you can get from adding labels to each post include: grouping makes posts easier to customize, a neater list of posts and a higher chance of Breadcrumbs being indexed by search engines.
Make sure each of your posts has a label, the best tip is to use a label title with a maximum of one word without spaces, the use of two words is forgivable, but three words or more should be avoided.
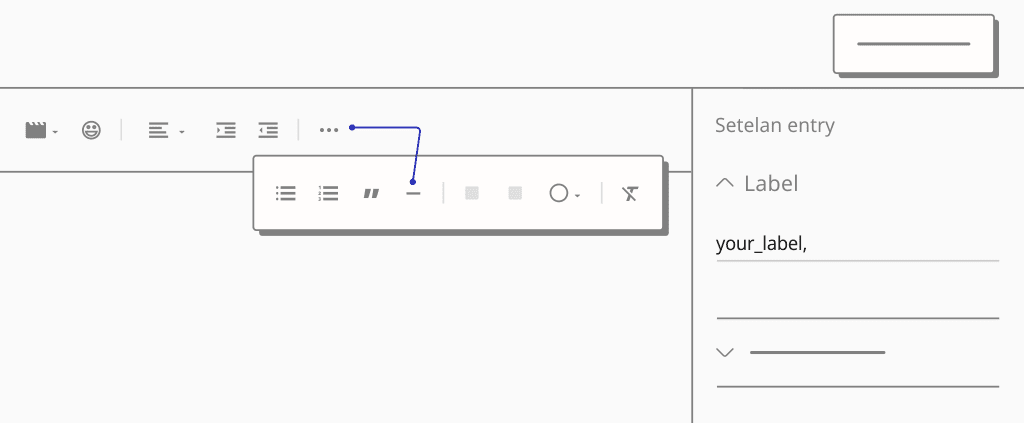
To add labels, simply highlight the side column in the post editor, you will find a tab entitled Label, add labels in the input provided, separate them with comma(,) to add two or more labels.

Use <p> tags for paragraphs
There are three options for creating paragraphs in posts, using <div>, <br>, or <p>, all tags will produce the same paragraph but in terms of structure the <p> tag is preferred by search engines because <p> was originally created to mark a paragraph, unlike the other two codes. Reference.
The good news is that Blogger now fully supports the <p> tag, you don't need to do anything in this section, unlike a few years ago before the update, at that time Blogger was still using the <div> tag so it had to be replaced with <p> manually.
Add rel='noreferrer' or rel='noopener' and target='_blank' attributes for external links
According to a reference from Chrome Lighthouse*, when you link to a page on another site using the target='_blank' attribute, you may expose your site to performance and security issues:
- If the other page is running a lot of Javascript, your page's performance may suffer.
- Other pages can access the
windowobject by using thewindow.openerproperty, this allows other pages to redirect your page to malicious URL.
For this reason, always use the rel='noreferrer' or rel='noopener' attribute when you add external links with target='_blank':
<a class='extL' href='your_url' rel='noreferrer' target='_blank'>link_name</a>
The rel='noreffer' attribute also serves to bypass Lighthouse's cross-origin destination audit.
Use Blogger's built-in post limiting feature
You may have experienced the number of posts displayed does not match the number specified in the Blogger settings, the only cause of this error is not found Post Limiter on the article, this is a feature that Blogger has provided for a long time but is still rarely used.
For that, make sure every post on your blog has a Post Limiter feature to minimize this error:
- In the Post Editor with Writing View, click on icon and find the Insert Post Limit feature, add it in the 2nd or 3rd paragraph of the article.
- Alternatively in HTML View mode, insert the
<!--more-->code in the 2nd or 3rd paragraph of the article.
Use heading tags
The heading tag serves to provide a visual break in the content, the right placement of the heading tag will provide a digestible piece of content for the reader. It may seem simple, but the header tag is a strong signal and important for SEO because it helps Google understand your content.
“When it comes to text on a page, a heading is a really strong signal telling us this part of the page is about this topic.”
— John Mueller, Google
Don't use multiple H1 tags
In a single page, the <h1> tag is usually the main title (depending on how the website code is organized) that is read by search engines, this tag should indicate what the content is about and make it easier for search engines to place the content in search results.
Based on this, it is important to place only one <h1> tag on a page. The rest you can use multiple <h2> - <h6> tags to other parts of the content on the page.
Add a number to the heading (optional)
As a small part of the features in our theme, you can add a number to the heading tag without being indexed by search engines (just as a description of the content):
<h2 class='h' data-text='1. '>Your_heading_title</h2>
Replace the number in the data-text attribute with the appropriate number for your content. Custom text writing is also allowed.
Disable/replace Blogger comment format
If you test a post's score on PageSpeed, you probably won't get a 100. After digging into it, we found that the main issue is Blogger's comment iframe and its javaScript code. Therefore, those of you who want a better score are advised to disable Blogger comments:
- On Blogger dashboard, go to Settings.
- Scroll down until you find the Comments group.
- Click on Comment location, a pop-up will appear showing several options.
- Select Hide and then click Save.
Another alternative is to use a 3rd party comment form, Disqus is the best recommendation, there are two options available and it supports lazyLoad: button-triggered Disqus Comments or Disqus Comments with onScroll function.
Disable the loadMore feature (optional)
We're not saying this feature is burdening your site, but based on personal experience, this feature reduces visit statistics because it replaces the post navigation page, this may be good for users but not for owners especially those who have ads installed on their sites. Navigation pages help increase the number of ad views and also indirectly lower the bounce rate* score, which is why many large news sites (in this case Indonesia) split their articles into several pages.
Find and remove or disable with comment tags the following code:
<b:comment><!--[ Load More - Delete this section if you want to disable this feature ]--></b:comment> <b:include cond='data:view.isHomepage or data:view.url == data:blog.homepageUrl.canonical path "search"' name='postPaginationMore'/>
Add search description
It is a basic part of SEO that is sometimes disregarded, even though it is very influential in determining SERP (Search Engine Result Page). The search description serves as a summary of the entire content, the more interesting the description is made, the more opportunities for visits to be obtained from search engines.
If this section is disabled, then search engines will randomly select descriptions according to the keywords that users are looking for. Keep in mind that the search description is not related to the blog description and is different on each page depending on the entry sentence:
- On your Blogger dashboard, go to Settings.
- Scroll down until you find the Meta tags group.
- If it's not active yet, click the switch button on Enable search description.
- Fill in the Search description for the homepage with a maximum of 150 characters.
- In the post editor, fill in the Search Description in the sidebar as well. Do the same for all your posts.


In the post page, the search description will appear just below the post title, this applies to all themes. However, you can remove it if you don't like it:
How to hide search description on post page?
Find the code as below, delete it or disable it by inserting a comment tag:
<!--[ Post description ]-->
<b:comment>Add a description on the post page only</b:comment>
<b:include cond='data:view.isPost' name='postDescription'/>
<!--[ Post description ]-->
<b:comment>Add a description on the post page only</b:comment>
<!--<b:include cond='data:view.isPost' name='postDescription'/>-->
Add alternative keywords (optional)
As an attempt to target or add more blog viewers, you can add alternative keywords on the homepage. This is optional you can apply it or not, because according to some sources* we learned meta keywords do not have a good function for SEO anymore.
<meta expr:content='data:blog.pageName.escaped ? data:blog.pageName.escaped : data:blog.title.escaped + ", keyword_1, keyword_2, keyword_3 "' name='keywords'/>
Separate with comma (,) to add a new keyword.
Customize blog title (optional)
Based on ahrefs* document on Meta title guidelines, the maximum length of a page title is 60 characters (including adding the site name). In general, most sites add their site name in the page title, so the formula will be like this:
article_title + site_name = Meta title
For example: Optimization Guide for Better SEO - Jago Desain
In the latest update, we changed the meta title rule to only add the blog name if the meta title does not exceed 60 characters and remove the blog name if the total characters are more than that.
If you don't agree with this change, you can revert back to the old version:
<!--[ SingleItem title ]-->
<b:comment>It will omit the blog title when the character count exceeds 57</b:comment>
<b:if cond='(data:blog.pageName.length + data:blog.title.length) gt 57'>
  <title><data:blog.pageName/></title>
  <b:else/>
  <title><data:blog.pageName/> - <data:blog.title/></title>
</b:if>
<!--[ SingleItem title ]-->
<title><data:blog.pageName.escaped/> - <data:blog.title.escaped/></title>
robots.txt setup guide
A robots.txt file provides a set of instructions to make it easier for search engine bots to create a page map of the site and determine which pages should be displayed in search results. Without this file, search engines will index all content even the parts/pages you want to hide.
The instructions of this file are quite clear and easy to create, the robots.txt file only consists of one or more rules to block or allow crawling to specified pages, this file can also be used to block malicious bots that may have a negative impact on site performance.
Here is a robots.txt file with two simple rules:
User-agent: *
Allow: /
Disallow: /search

Sitemap: https://your_domain.blogspot.com/sitemap.xml
User-agent, the name of search engine bot. Writing*to specify rules that apply to all user-agent types.Allow, all user-agents are allowed to crawl the entire site. This can be omitted because the default behavior is that user-agents are allowed to crawl the entire page.Disallow, prohibits or blocks user-agents from crawling specific pages. In the example above, the user-agent is not allowed to crawl any URL that starts withhttps://your_domain.blogspot.com/search.Sitemap, tells the user-agent where the sitemap is located, replace with the URL of your site.
Example with more than one blocking instruction:
User-agent: *
Allow: /
Disallow: /search
Disallow: /p/contact.html
Disallow: /2023/02/post_title.html

Sitemap: https://your_domain.blogspot.com/sitemap.xml
Follow this guide to enable robots.txt:
- On Blogger dashboard, go to Settings.
- Scroll down until you find the Crawlers and indexing group.
- Click the switch button on Enable custom robots.txt.
- Paste a new
robots.txtfile into the custom robots.txt field, you can copy one of the example files above. - Make sure to directly check the changes in the
robots.txtfile by adding/robots.txtto the end of your blog URL, for example:https://your_domain.blogspot.com/robots.txt.
Menambahkan thumbnail pada rich snippet
Kami biasa menyebutnya Open Graph, kustomisasi ini berguna untuk menambahkan gambar cuplikan ketika halaman web dibagikan ke platform media sosial seperti Whatsapp, Facebook, atau Twitter.
Secara default, snippet image hanya akan muncul di halaman post dengan mengambil data dari gambar pertama pada artikel, namun snippet image tidak muncul ketika link homepage di share ke media sosial, hal ini dikarenakan tidak ada data gambar yang dapat diambil oleh server, untuk itu Anda harus menambahkan url gambar secara manual, pada Edit HTML temukan kode seperti ini:
<b:comment>Replace Add_your_image_url_here with your image url</b:comment>
<b:with value='{url: "Add_your_image_url_here"}' var='thumb'>
<meta expr:content='data:thumb.url' property='og:image'/>
<meta expr:content='data:thumb.url' name='twitter:image:src'/>
</b:with>
Ganti kode yang bertanda Add_your_image_url_here dengan url gambar Anda. Kami sarankan untuk menggunakan gambar dengan rasio 16:9 atau setara dengan 1280px*720px.
Untuk mendapatkan url gambar, unggah terlebih dahulu melalui post editor, lalu klik kanan pada gambar › Copy image address.
Menambahkan/mengganti thumbnail pada skema bawaan
Untuk menghindari kesalahan pada Google Rich Result Test, kami menambahkan thumbnail default untuk halaman beranda dan logo dari jagodesain.com dalam skema blog JSON, kami tidak bermaksud atau bertujuan lain selain itu, hal ini juga tidak banyak berpengaruh pada situs Anda tapi Anda dapat selalu menggantinya kapanpun Anda mau, temukan kode seperti ini:
<b:includable id='postMetadataJSONImage'>
"image": {
...
/* Get the first image, otherwise no default image will be shown */
"url": "<b:eval expr='(data:post.featuredImage ? resizeImage(data:post.featuredImage, 1200, "1200:630") : "https://blogger.googleusercontent.com/img/b/R29vZ2xl/AVvXsEjB3ycrdFFjMviBoUGCOg09Atonnuj40E6socEJJIWDs6sysO-vBDc26KLj2aQsHkeAmuM400e8Jdsy0-T0TYoCpZ2Bt76Xk01OL5Pa7-pCDntGl-YtzPFJrZL9ls_7O57LMy2H0R0HBYA/s1600/jagotheme-img.png")'/>",
"height": <b:eval expr='data:post.featuredImage ? 630 : 420'/>,
"width": 1200
},
</b:includable>
<b:includable id='postMetadataJSONPublisher'>
"publisher": {
...,
...,
"logo": {
"@type": "ImageObject",
"url": "https://blogger.googleusercontent.com/img/b/R29vZ2xl/AVvXsEie8b3EU9IO25um9FwH5dnzEVDBzxaro-jwYmwr7kCaAQ8ZQP-7Y3QA-9QXhr6KkdI0oXRwy_b-xnNWmrkK2aCjzzU0D2CnefW24OaBtna5qW0mPpcd8bylGqBEYy0KilL50ziSJr4fb8E/s0/jd-logo.png",
"width": 297,
"height": 45
}
},
</b:includable>
Anda akan menemukan beberapa kode serupa di tempat berbeda, ganti bagian yang ditandai pada kode di atas dengan url gambar Anda, tidak ada ukuran gambar yang disarankan dalam pengaturan ini, tetapi akan lebih baik untuk menggunakan 1200*420 sesuai dengan nilai width and height pada kode di atas, dan 297*45 untuk logo, Anda juga dapat mengubah opsi ukuran agar sesuai dengan gambar yang Anda miliki dengan mengubah nilai width and height yang ditandai pada kode di atas.
Menggunakan lazy load pada gambar
Gambar menjadi salah satu penyebab menurunnya skor Pagespeed, pastikan setiap gambar pada postingan Anda menggunakan lazy load, web.dev juga menyarankan hal yang sama. Lihat halaman Komponen untuk panduan pengguna.
Bagaimana cara menambahkan thumbnail tanpa menampilkannya di postingan?
Anda mungkin ingin membuat postingan tanpa gambar, tapi walau bagaimanapun setidaknya harus ada satu gambar dalam postingan Anda yang nantinya akan dijadikan thumbnail, untuk mensiatasinya gunakan kode di bawah ini pada bagian awal postingan:
<!--<div class='separator hidden'>
  <img alt='image_title' src='https://blogger.googleusercontent.com/img/.../image.png'/>
</div>-->
Tag komentar <!-- --> membuat gambar hanya terbaca sebagai teks dan tidak akan muncul di halaman postingan, tetapi ditampilkan sebagai thumbnail postingan. Pastikan juga sudah mengganti url gambar beserta atribut alt=''.
Menambahkan label disetiap postingan
Keuntungan yang bisa Anda dapatkan dari menambahkan label ke setiap posting antara lain: pengelompokan membuat posting lebih mudah untuk disesuaikan, daftar posting yang lebih rapi dan peluang Breadcrumb yang lebih tinggi untuk diindeks oleh mesin pencari.
Pastikan setiap postingan Anda memiliki label, tips terbaik adalah menggunakan judul label dengan maksimal satu kata tanpa spasi, penggunaan dua kata masih bisa dimaafkan, namun tiga kata atau lebih harus dihindari.
Untuk menambahkan label, cukup sorot kolom samping di editor posting, Anda akan menemukan tab berjudul Labels, tambahkan label pada input yang disediakan, dipisahkan dengan koma(,) untuk menambahkan dua label atau lebih.
Menggunakan tag <p> pada paragraf
Ada tiga pilihan untuk membuat paragraf pada postingan, menggunakan <div>, <br>, atau <p>, semua tag akan menghasilkan paragraf yang sama namun dari segi struktur tag <p> lebih disukai oleh mesin pencari karena <p> pada awalnya dibuat untuk menandai paragraf, tidak seperti dua kode yang lain.
Kabar baiknya adalah Blogger sekarang sudah mendukung penuh tag <<p>, Anda tidak perlu melakukan apapun pada bagian ini, tidak seperti beberapa tahun yang lalu sebelum adanya update, saat itu Blogger masih menggunakan tag <div> sehingga harus diganti dengan <p> secara manual.
Menambahkan atribut rel='noreferrer' atau rel='noopener' dan target='_blank' untuk eksternal link
Menurut referensi dari Chrome Lighthouse*, ketika Anda menautkan ke halaman di situs lain menggunakan atribut target='_blank', Anda dapat mengekspos situs Anda ke masalah kinerja dan keamanan:
- Jika halaman lain tersebut menjalankan banyak Javascript, kinerja halaman Anda mungkin akan terganggu.
- Halaman lain dapat mengakses objek
windowdengan menggunakan propertiwindow.opener, ini memungkinkan halaman lain untuk mengarahkan halaman Anda ke URL berbahaya.
Untuk alasan ini, selalu gunakan atribut rel='noreferrer' atau rel='noopener' ketika Anda menambahkan tautan eksternal dengan target='_blank':
<a class='extL' href='your_url' rel='noreferrer' target='_blank'>link_name</a>
Atribut rel='noreferrer' juga berfungsi untuk mem-bypass audit cross-origin destination pada Lighthouse.
Menggunakan fitur Pembatas Postingan bawaan Blogger
Anda mungkin pernah mengalami jumlah postingan yang ditampilkan tidak sesuai dengan jumlah yang ditentukan pada pengaturan Blogger, satu-satunya penyebab error ini adalah tidak ditemukannya Pembatas Postingan pada artikel, ini adalah fitur yang sudah lama disediakan Blogger namun masih jarang digunakan.
Untuk itu, pastikan setiap postingan di blog Anda memiliki fitur Pembatas Postingan untuk meminimalisir error ini:
- Pada Editor Postingan dengan Tampilan Menulis, klik ikon dan temukan fitur Sisipkan batas postingan, tambahkan di paragraf ke-2 atau ke-3 artikel.
- Dalam mode Tampilan HTML, masukkan kode
<!--more-->pada paragraf ke-2 atau ke-3 artikel.
Menggunakan tag heading
Tag heading berfungsi untuk memberikan jeda visual pada konten, penempatan tag heading yang tepat akan memberikan konten yang mudah dicerna oleh pembaca. Mungkin terlihat sederhana, tetapi tag heading merupakan sinyal yang kuat dan penting untuk SEO karena membantu Google memahami konten Anda.
“Dalam hal teks pada halaman, tajuk adalah sinyal yang sangat kuat yang memberi tahu kami bahwa bagian halaman ini membahas topik ini.”
— John Mueller, Google
Jangan gunakan lebih dari satu tag H1
Dalam satu halaman, tag <h1> biasanya merupakan judul utama (tergantung pada bagaimana kode situs web disusun) yang dibaca oleh mesin pencari, tag ini harus menunjukkan tentang apa konten tersebut dan memudahkan mesin pencari untuk menempatkan konten dalam hasil pencarian.
Berdasarkan hal ini, penting untuk menempatkan hanya satu tag <h1> pada sebuah halaman. Selebihnya Anda bisa menggunakan beberapa tag <h2> - <h6> ke bagian lain dari konten di halaman tersebut.
Menambahkan nomor pada tag heading (opsional)
Sebagai bagian kecil dari fitur di tema kami, Anda dapat menambahkan nomor ke tag judul tanpa diindeks oleh mesin pencari (hanya sebagai deskripsi konten):
<h2 class='h' data-text='1. '>Your_heading_title</h2>
Ganti nomor pada atribut data-text dengan nomor yang sesuai untuk konten Anda. Penulisan teks khusus juga diperbolehkan.
Nonaktifkan/ganti format komentar Blogger
Jika Anda menguji skor postingan di PageSpeed, Anda mungkin tidak akan mendapatkan nilai 100. Setelah menyelidikinya, kami menemukan bahwa masalah utamanya adalah iframe komentar Blogger dan kode javaScript-nya. Oleh karena itu, bagi Anda yang menginginkan skor yang lebih baik disarankan untuk menonaktifkan komentar Blogger:
- Pada dasbor Blogger, pergi ke Setelan.
- Gulir ke bawah hingga Anda menemukan grup Komentar.
- Klik pada Lokasi komentar, akan muncul pop-up yang menampilkan beberapa opsi.
- Pilih Sembunyikan dan kemudian klik Simpan.
Alternatif lain adalah menggunakan formulir komentar pihak ketiga, Disqus adalah rekomendasi terbaik, ada dua pilihan yang tersedia dan mendukung lazyLoad: Komentar Disqus yang dipicu oleh tombol atau Komentar Disqus dengan fungsi onScroll.
Nonaktifkan fitur loadMore (optional)
Kami tidak mengatakan fitur ini memberatkan situs Anda, namun berdasarkan pengalaman pribadi, fitur ini mengurangi statistik kunjungan karena menggantikan halaman navigasi postingan, hal ini mungkin baik untuk pengguna namun tidak untuk pemilik situs terutama yang memasang iklan di situsnya. Halaman navigasi membantu meningkatkan jumlah penayangan iklan dan juga secara tidak langsung mengurangi skor bounce rate* pada situs, tidak heran banyak situs berita besar (dalam hal ini Indonesia) yang membagi artikelnya menjadi beberapa halaman.
Temukan dan hapus atau nonaktifkan dengan tag komentar kode berikut ini:
<b:comment><!--[ Load More - Delete this section if you want to disable this feature ]--></b:comment> <b:include cond='data:view.isHomepage or data:view.url == data:blog.homepageUrl.canonical path "search"' name='postPaginationMore'/>
Menambahkan deskripsi penelusuran
Deskripsi pencarian merupakan bagian dasar dari SEO yang terkadang diabaikan, padahal sangat berpengaruh dalam menentukan SERP (Search Engine Result Page). Deskripsi pencarian berfungsi sebagai rangkuman dari keseluruhan konten, semakin menarik deskripsi yang dibuat, maka semakin besar peluang kunjungan yang didapat dari mesin pencari.
Jika bagian ini dinonaktifkan, maka mesin pencari akan memilih deskripsi secara acak sesuai dengan kata kunci yang dicari pengguna. Perlu diingat bahwa deskripsi pencarian tidak berhubungan dengan deskripsi blog dan berbeda di setiap halaman tergantung pada kalimat entri:
- Di dasbor Blogger, buka Setelan.
- Gulir ke bawah hingga Anda menemukan grup Meta tag.
- Jika belum aktif, klik tombol sakelar pada Aktifkan deskripsi pencarian.
- Isi deskripsi Pencarian untuk beranda dengan maksimal 150 karakter.
- Pada editor postingan, isi juga Deskripsi Penelusuran pada bilah samping. Lakukan hal yang sama untuk semua postingan Anda.
Pada halaman postingan, deskripsi pencarian akan muncul tepat di bawah judul postingan, hal ini berlaku untuk semua tema. Namun, Anda dapat menghapusnya jika Anda tidak menyukainya:
Bagaimana cara menyembunyikan deskripsi di halaman postingan?
Temukan kode seperti di bawah ini, hapus atau nonaktifkan dengan menyisipkan tag komentar:
<!--[ Post description ]-->
<b:comment>Add a description on the post page only</b:comment>
<b:include cond='data:view.isPost' name='postDescription'/>
<!--[ Post description ]-->
<b:comment>Add a description on the post page only</b:comment>
<!--<b:include cond='data:view.isPost' name='postDescription'/>-->
Menambahkan kata kunci alternatif (optional)
Sebagai upaya untuk menargetkan atau menambah jumlah pengunjung blog, Anda bisa menambahkan kata kunci alternatif pada homepage. Hal ini bersifat opsional, Anda bisa menerapkannya atau tidak, karena menurut beberapa sumber* yang kami pelajari meta keyword sudah tidak lagi memiliki fungsi yang baik untuk SEO.
<meta expr:content='data:blog.pageName.escaped ? data:blog.pageName.escaped : data:blog.title.escaped + ", keyword_1, keyword_2, keyword_3 "' name='keywords'/>
Pisahkan dengan tanda koma (,) untuk menambahkan kata kunci baru.
Sesuaikan judul blog (opsional)
Berdasarkan dokumen ahrefs* tentang pedoman Meta title, panjang maksimum judul halaman adalah 60 karakter (termasuk menambahkan nama situs). Pada umumnya, sebagian besar situs menambahkan nama situs mereka di judul halaman, sehingga rumusnya akan menjadi seperti ini:
judul_artikel + nama_situs = Meta title
Sebagai contoh: Panduan Optimasi untuk SEO yang Lebih Baik - Jago Desain
Pada update terbaru, kami mengubah aturan meta title menjadi hanya menambahkan nama blog jika meta title tidak melebihi 60 karakter dan menghapus nama blog jika total karakter lebih dari itu.
Jika Anda tidak setuju dengan perubahan ini, Anda dapat kembali ke versi lama:
<!--[ SingleItem title ]-->
<b:comment>It will omit the blog title when the character count exceeds 57</b:comment>
<b:if cond='(data:blog.pageName.length + data:blog.title.length) gt 57'>
  <title><data:blog.pageName/></title>
  <b:else/>
  <title><data:blog.pageName/> - <data:blog.title/></title>
</b:if>
<!--[ SingleItem title ]-->
<title><data:blog.pageName.escaped/> - <data:blog.title.escaped/></title>
Panduan setel robots.txt
File robots.txt menyediakan serangkaian instruksi untuk memudahkan bot mesin pencari membuat peta halaman situs dan menentukan halaman mana yang harus ditampilkan dalam hasil pencarian. Tanpa file ini, mesin pencari akan mengindeks semua konten bahkan bagian/halaman yang ingin Anda sembunyikan.
Instruksi dari file ini cukup jelas dan mudah untuk dibuat, file robots.txt hanya terdiri dari satu atau beberapa aturan untuk memblokir atau mengizinkan crawling ke halaman tertentu, file ini juga dapat digunakan untuk memblokir bot jahat yang mungkin berdampak negatif pada kinerja situs.
Berikut ini adalah file robots.txt dengan dua aturan sederhana:
User-agent: *
Allow: /
Disallow: /search

Sitemap: https://your_domain.blogspot.com/sitemap.xml
User-agent, nama bot mesin pencari. Penulisan*untuk menentukan aturan yang berlaku untuk semua jenis user-agent.Allow, semua user-agent diizinkan untuk meng-crawl seluruh situs. Ini dapat dihilangkan karena perilaku defaultnya adalah user-agent diizinkan untuk meng-crawl seluruh halaman.Disallow, melarang atau memblokir user-agent untuk meng-crawl halaman tertentu. Pada contoh di atas, user-agent tidak diizinkan untuk meng-crawl URL apa pun yang dimulai denganhttps://your_domain.blogspot.com/search.Sitemap, memberi tahu user-agent di mana letak peta situs, ganti dengan URL situs Anda.
Contoh dengan lebih dari satu instruksi pemblokiran:
User-agent: *
Allow: /
Disallow: /search
Disallow: /p/contact.html
Disallow: /2023/02/post_title.html

Sitemap: https://your_domain.blogspot.com/sitemap.xml
Ikuti panduan ini untuk mengaktifkan robots.txt
- Di dasbor Blogger, buka Setelan.
- Gulir ke bawah hingga Anda menemukan grup Crawler dan pengindeksan.
- Klik tombol sakelar pada Aktifkan robots.txt khusus.
- Tempelkan file
robots.txtbaru ke dalam kolom robots.txt kustom, Anda dapat menyalin salah satu file contoh di atas. - Pastikan untuk langsung memeriksa perubahan pada file robots.txt dengan menambahkan
/robots.txtdi akhir URL blog Anda, misalnya:https://your_domain.blogspot.com/robots.txt.
- web.dev/browser-level-image-lazy-loading/
- developer.chrome.com/docs/lighthouse, Links to cross-origin destinations are unsafe.
- searchenginejournal.com/on-page-seo, How To Use Header Tags: SEO Best Practices.
- reusser.com/blog, The Do’s and Don’ts of Heading Tags.
- support.google.com/analytics, Bounce rate.
- searchenginejournal.com/ranking-factors/meta-keywords/, Are Meta Keywords A Google Ranking Factor?
- developers.google.com/search/blog, Google does not use the keywords meta tag in web ranking.
- developers.google.com/search/docs, How to write a robots.txt file
- ahrefs.com/blog, Meta Tags for SEO: A Simple Guide for Beginners